
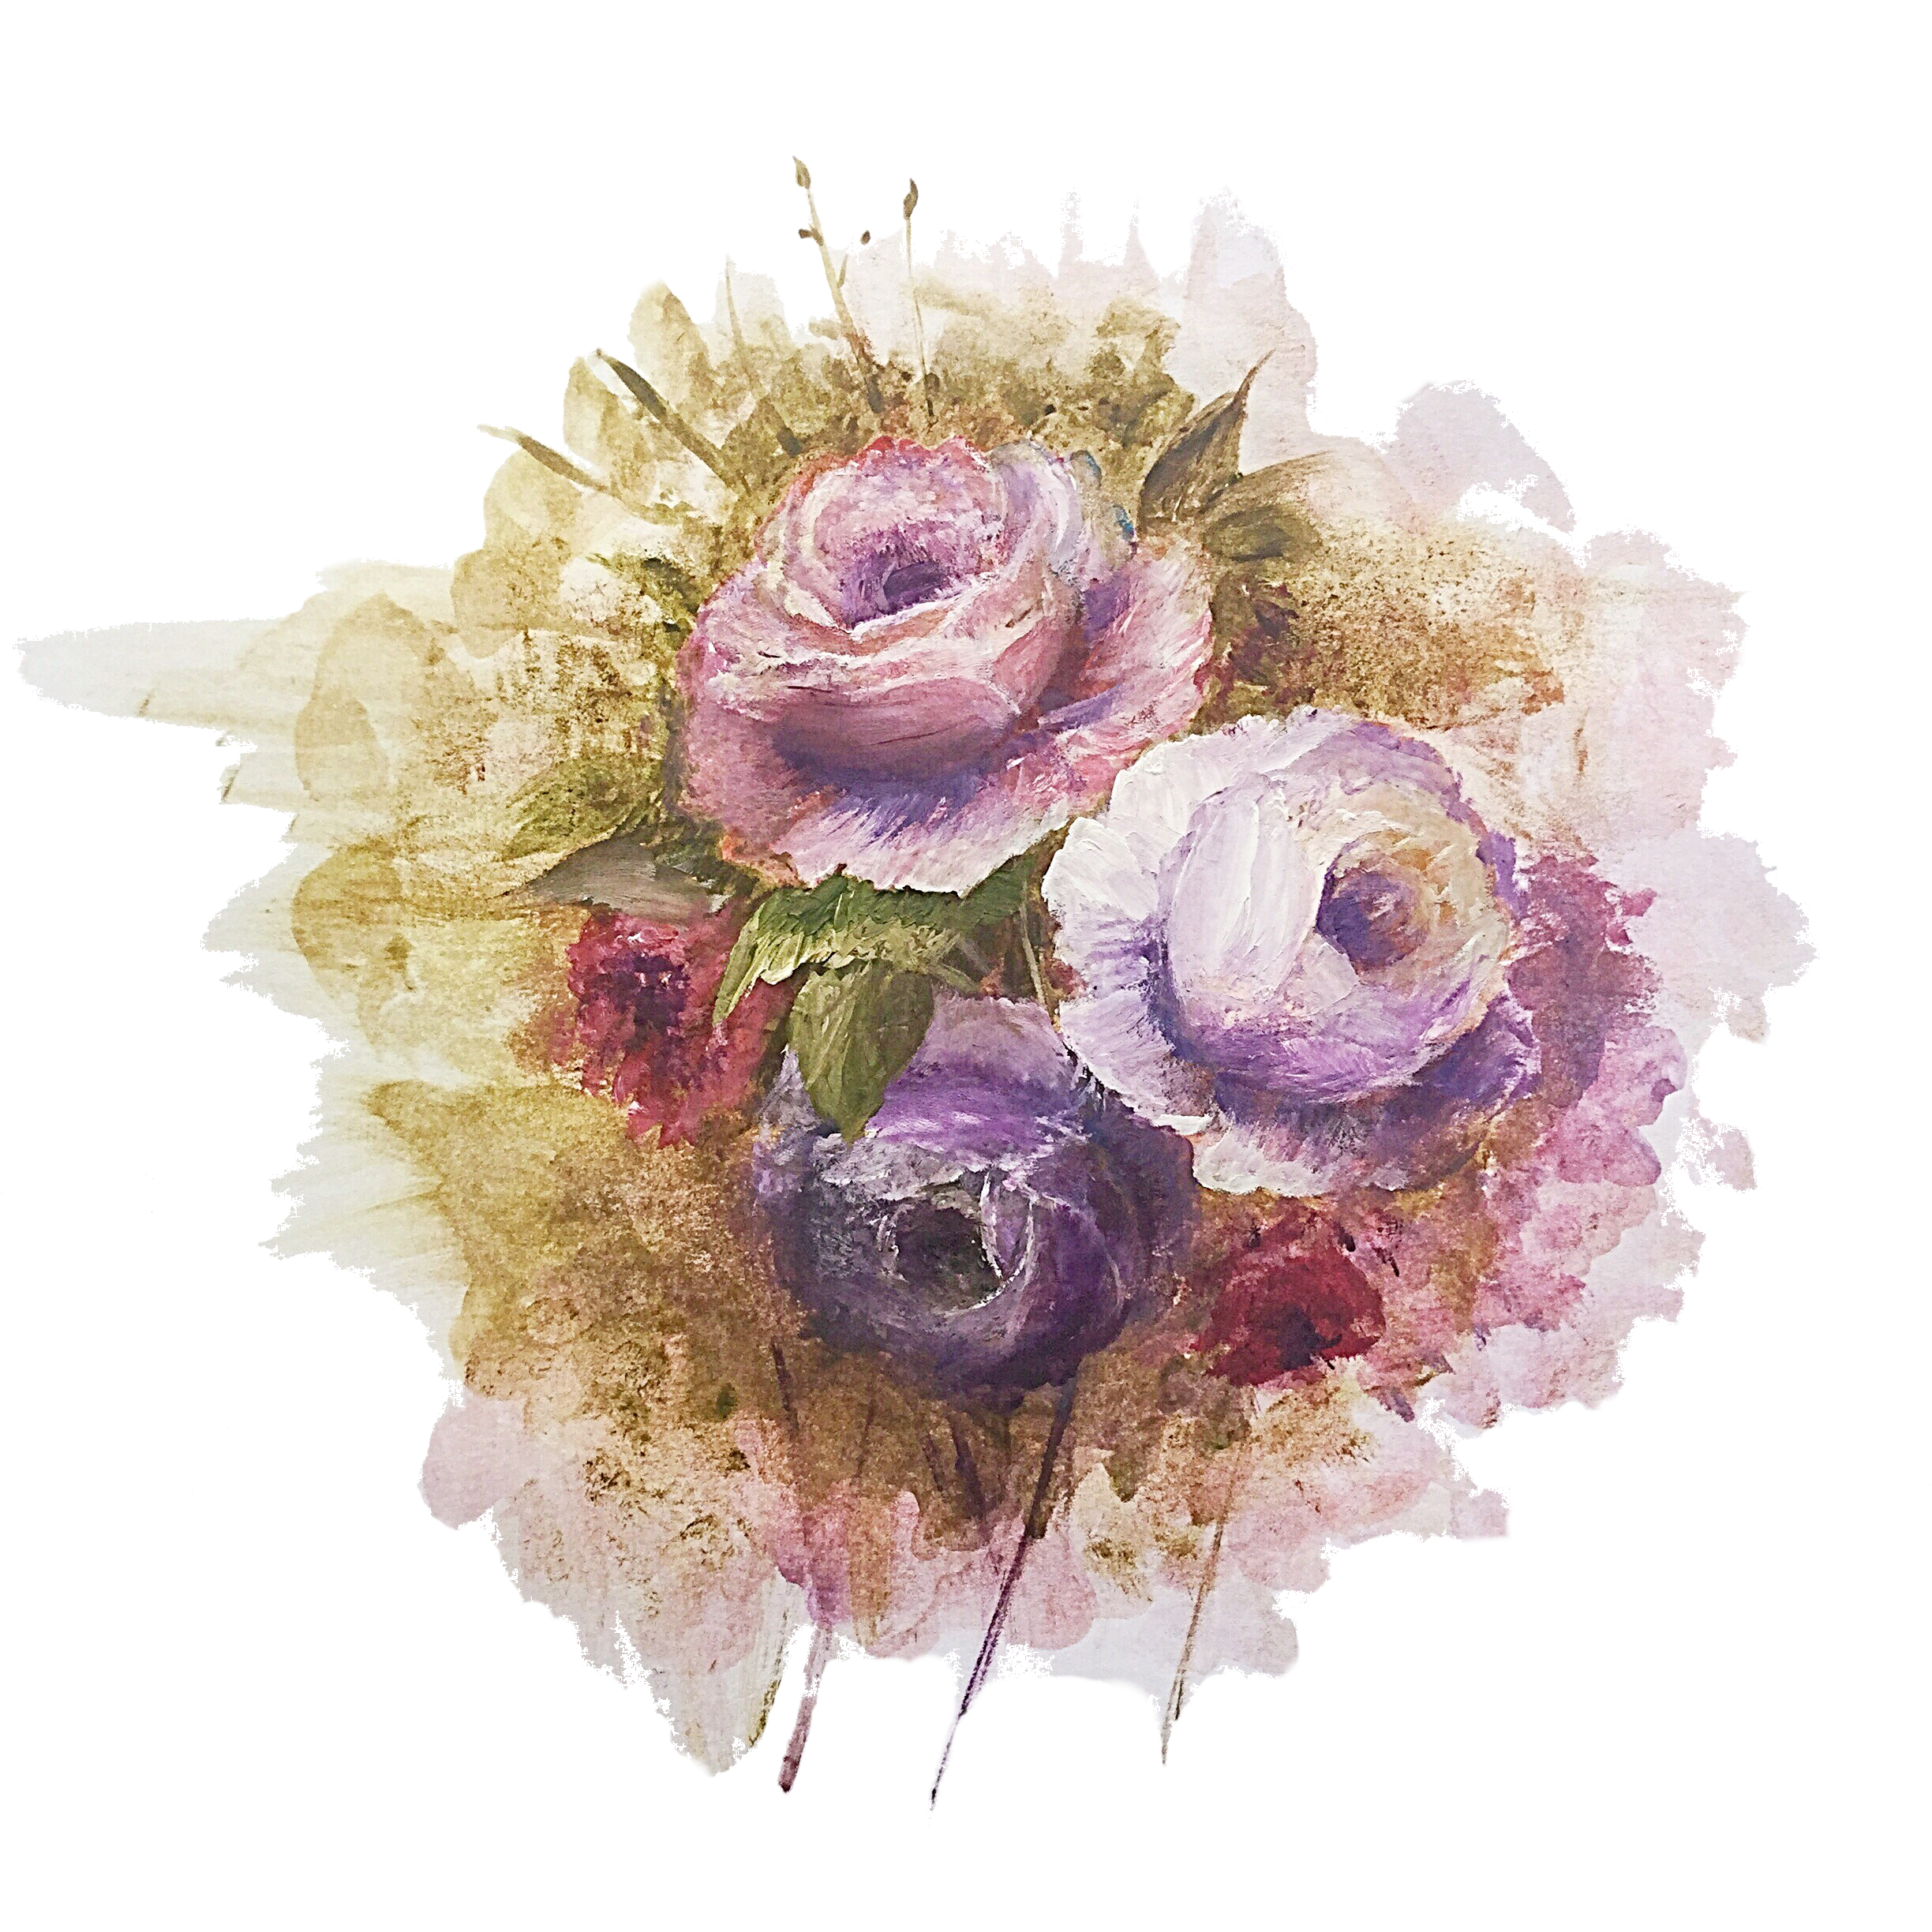
The art of painting roses in oil paints lies in selecting the right colours based on the particular rose that you would like to depict, based on real life or reference photography, and layering them appropriately.
As with most things to do with oil paint, of course, this is easier written down than it is to execute. While on paper, I can say that variety is especially important when painting singular-coloured flowers. This information is useless without going over what variety is when it comes to oil paint, and how to apply it when layering.
The first step in painting a rose in oil is to find a natural rose in real life or a picture that presents the kind of rose you’d like to be painting in a variety of angles, with a clear and visible light source and a good view of the layered rose petals.
See also: Painting from Reference Photos, Still Life or Imagination?
There are many different types of roses to choose from, each with different levels of overlap between petals, but all generally contain the same basic petal structure. So having one picture as the reference for your sketch (if you need to make a sketch), and an additional few pictures that will be used for greater comprehension of colour values and the interaction of light is a good idea.
Once you’ve selected a picture to work with as the base of your painting, you can loosely sketch the rose using a very fine brush, or, for more control, a grease pencil that you can go over with a dark colour after you’ve applied the base coat of neutral colour to create a wet canvas to work on.
The purpose of this sketch layer is not to copy the rose exactly – it can be very loose and abstract – but to give you a basic structure to work off of. As you keep practicing these roses, you may no longer need a sketch layer and may be able to start directly with paint.
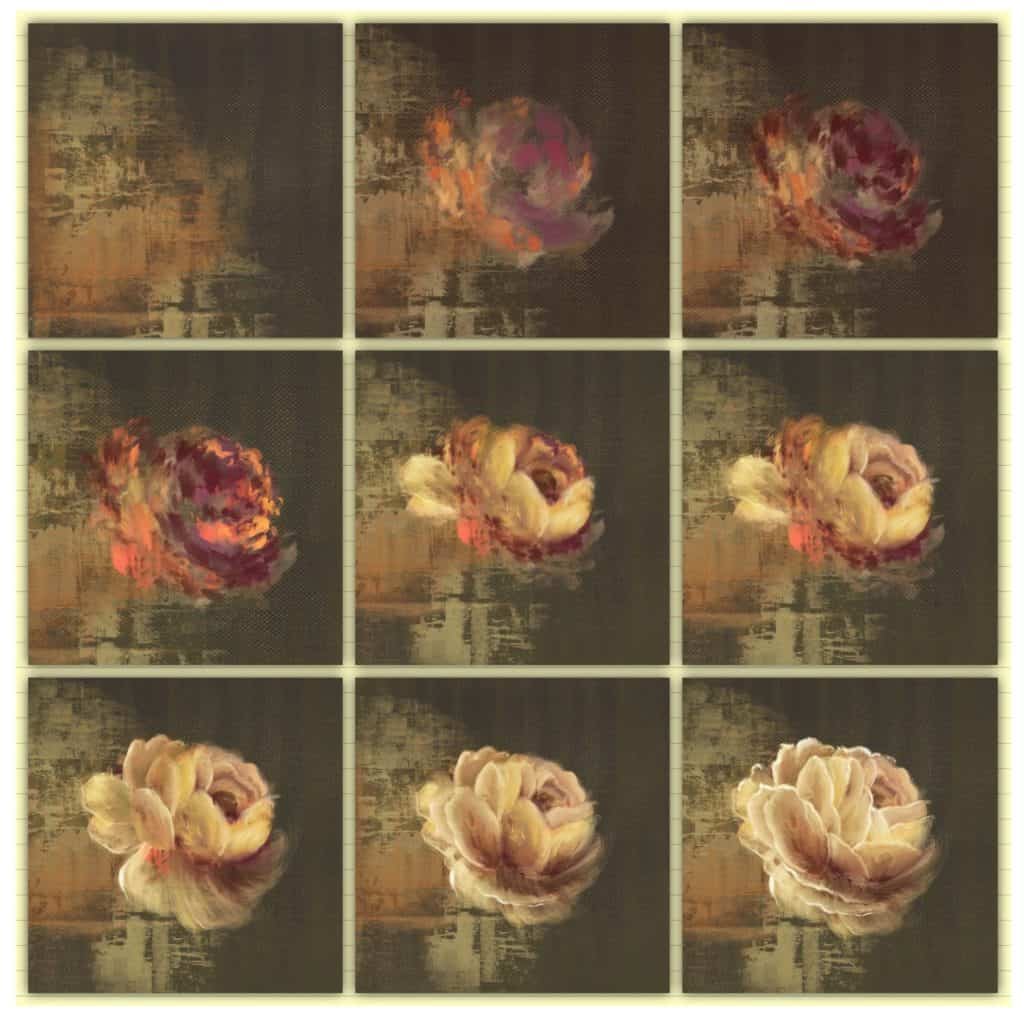
At each point in an oil painting, it can be very easy to start doubting yourself, because of how distant it is from the finished work, but the purpose of each layer is to gradually add weight and structure to the piece, not to reflect exactly what the completed painting will look like.
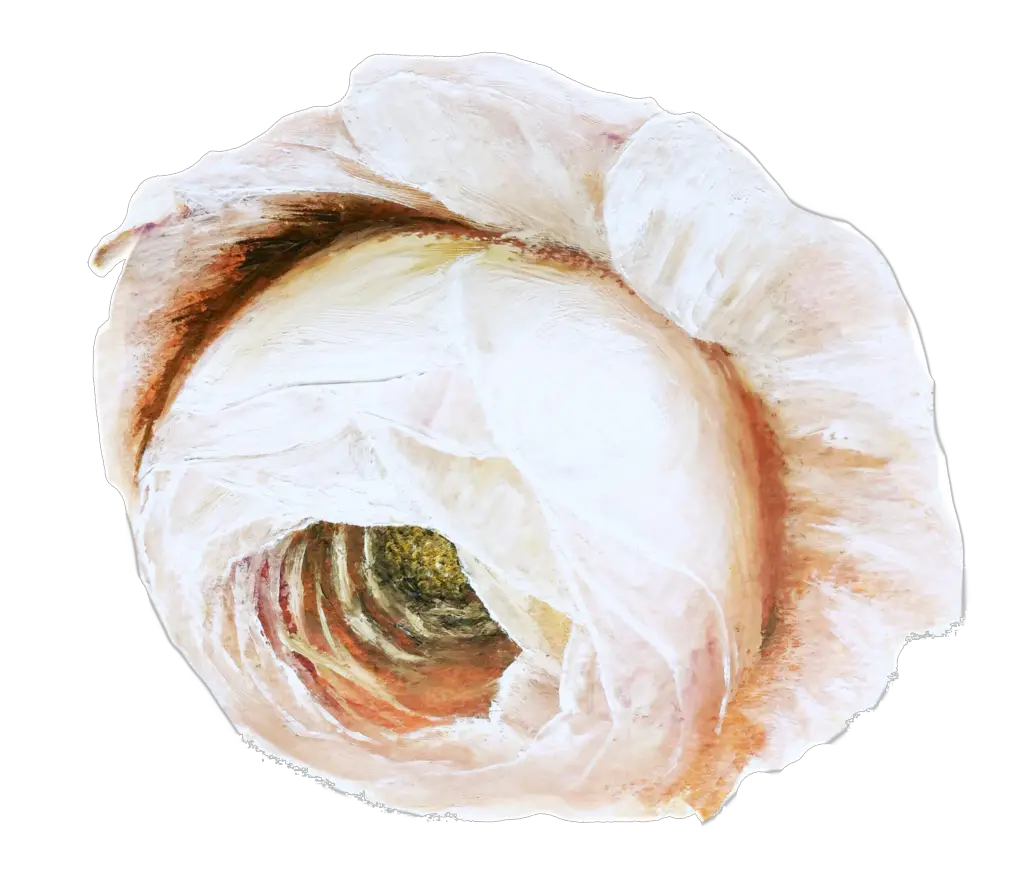
Something to remember with oil paints is that it is very rare to see a pure, unmixed version of a colour out in the world, especially when it comes to plants and flowers, and this goes for the petals of your rose, too.
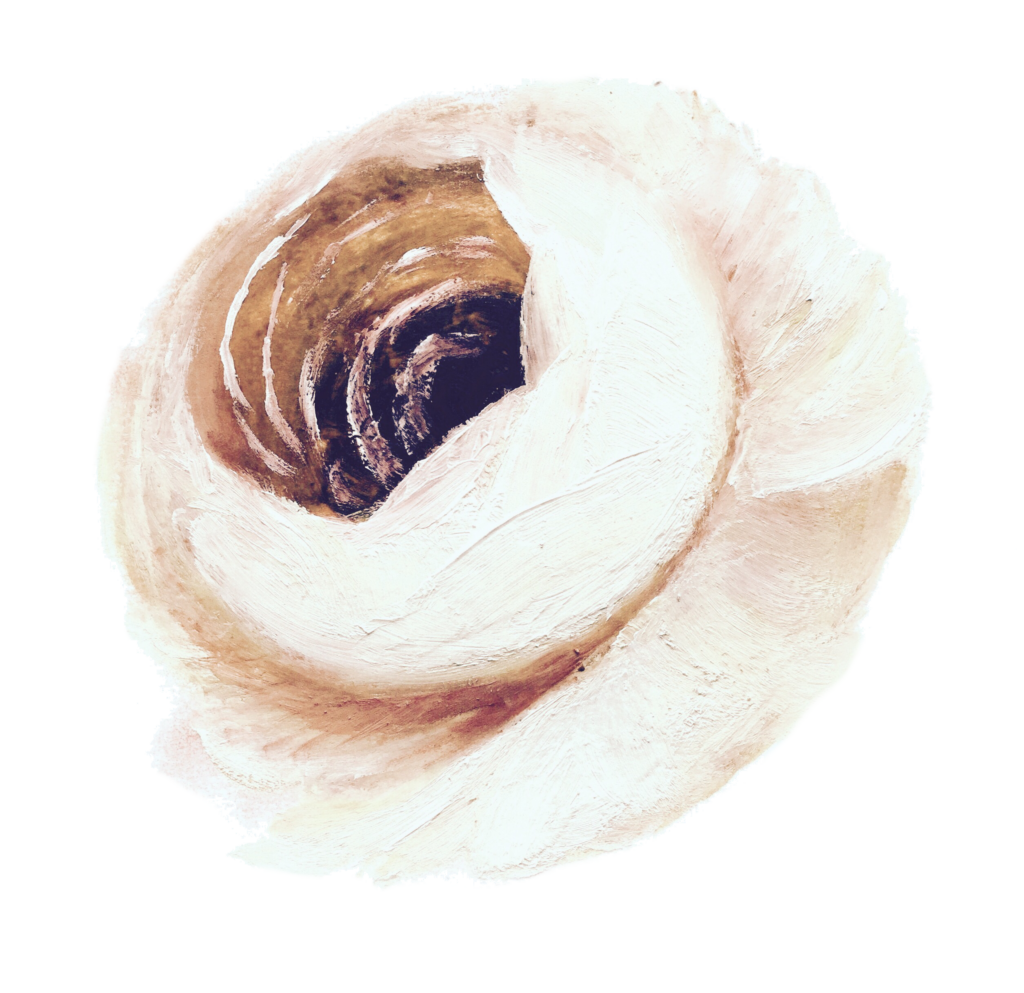
If you are painting a white rose, even the base white layer, without any shading, should be a little warmer than you expect it to be, with a little bit of yellow and green pigments worked into it.
Mix your paint on your paint palette in small batches to create colours with a more natural transition, and apply them in small, quick brushstrokes, which will allow the layers to dry more rapidly for a faster application of accumulating layers. This accumulation will add depth and opacity to your painting, as each individual coat of oil paint is relatively thin and watery on its own, allowing light to pass through it, and it is only with gradual addition of more colours that we get warmth and subtle detailing.
With the baseline colour applied, white for a white rose, yellow for a yellow rose, red for a red rose, and so on and so forth, you can move onto the more engaging process of adding light and shadow to the petals. This will do most of the work in giving your rose structure, and the feeling of light dispersing across its surface.
In order to create darker shadows, mix your colour with cooler pigments – a little bit of burnt umber, for example, or a touch of cobalt blue. Colour selection becomes very important here, as is the kind of mood you’d like to achieve with it.
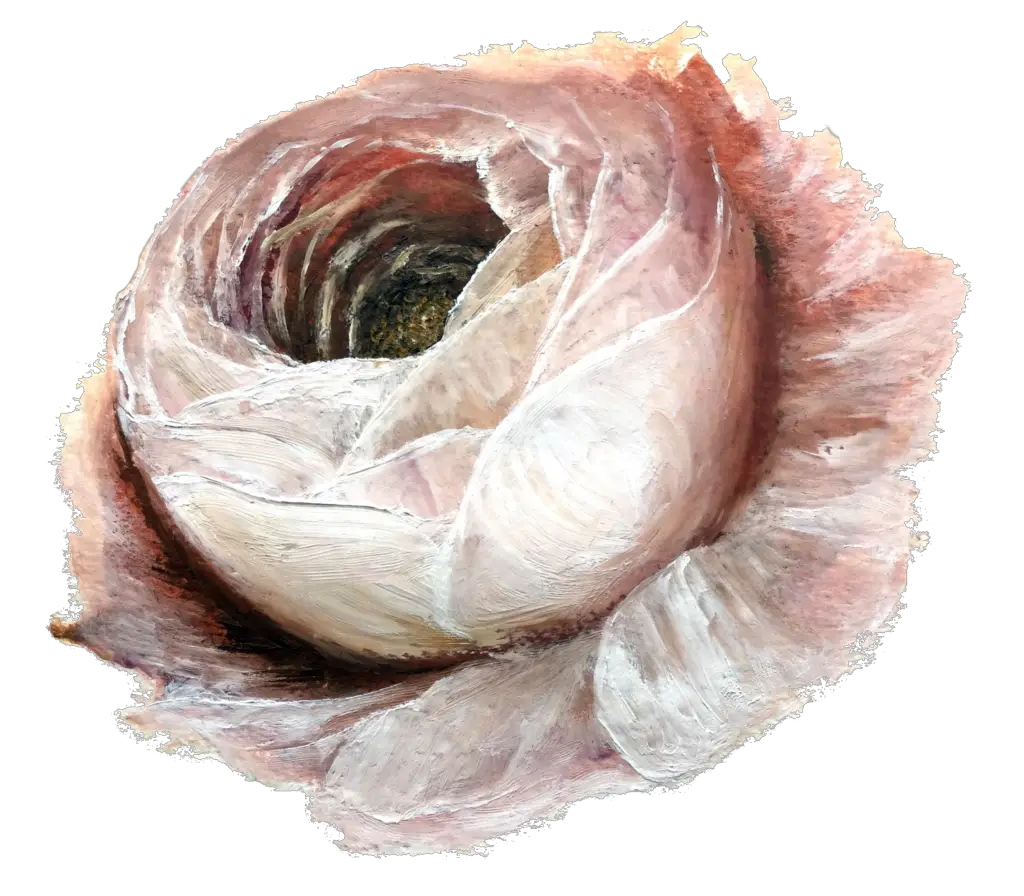
Some white roses have underlying purplish shades, which give it a slightly blue colour at its shadows, while others are pinker, and so require blending white with a small amount of red pigment. While mixing red with a small amount of blue pigment will be appropriate to shade red roses, that same colour won’t appear natural for yellow or orange roses, which need to be mixed with red or burnt umber to achieve the desired effect. Look closely at your reference photos, mix frequently and in small amounts, and paint only when you want to add depth.
Two concepts that are important in adding the finishing touches on your rose are variety and value.
Variety is the process of adding very slightly different shades of the same colour to an oil painting in order to add interest and intrigue to a piece where it is appropriate. Adding speckling, splotching, and very small details using slightly yellower, redder, or bluer versions of the baseline colour and carefully working it in using blending, especially towards the outer curve of each petal.
Value, on the other hand, relies on a different understanding of colour theory, creating the darkest and brightest points of light on an oil painting using an application of tone – either adding white or black to a baseline paint. Adding values to a painting means adding these lighter and darker versions to very small areas as one of the final touches on a work, typically as an outline of the shapes in question, and working off of the light source that is visible in the reference photo.
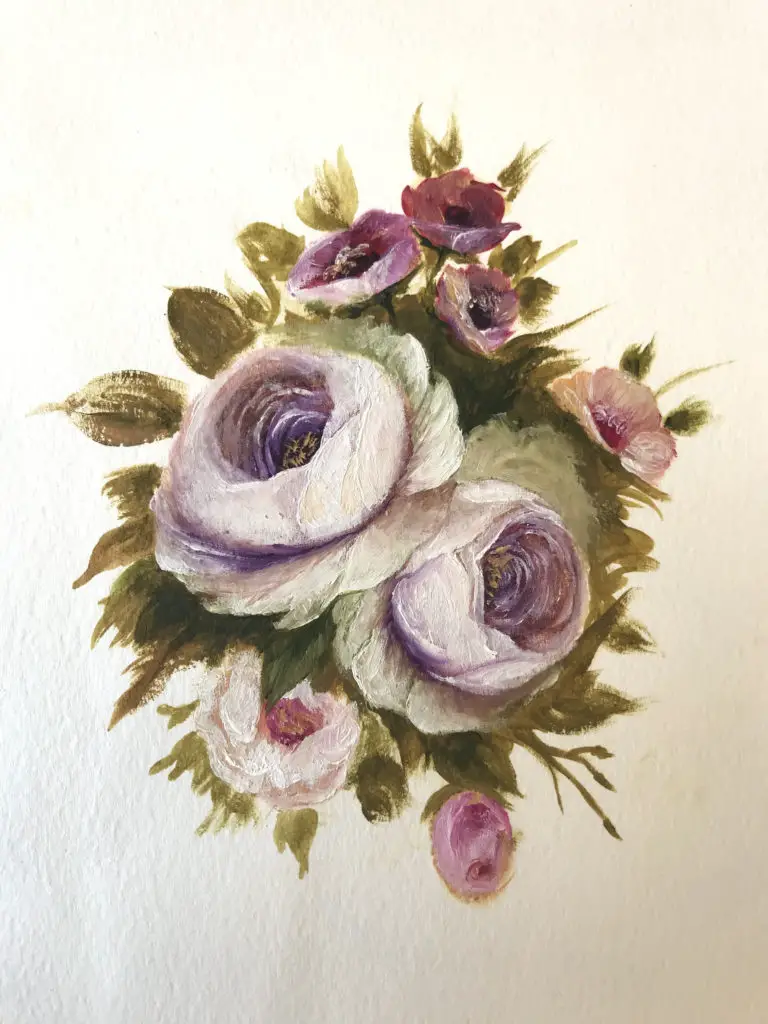
Both variety and value should be used to add fine detailing, and so shouldn’t feature too heavily in the finished piece, being blended into the final layers of the painting to really balance out the piece and bring it to life. With the correct application of these effects, and a few ultimate brushstrokes to blend them into the piece, you should be left with a painting of a rose that seems to come to life right off the canvas.