
Oil painting in the style of the old masters depends on a lot of practice as well as skill. There’s nothing to teach you how to paint portraits in the style of so many classical artists who have dedicated their lives to creating such art, than painting from real life, or using the reference of other artworks, over and over and over again.
That being said, it is important to remember that practice makes permanent, not perfect – not unless, that is, you make sure to practice using the right technique and honing your craft with patience and mindfulness.
With this in mind, let us go over some of the better methods that you should employ when practicing this type of painting.

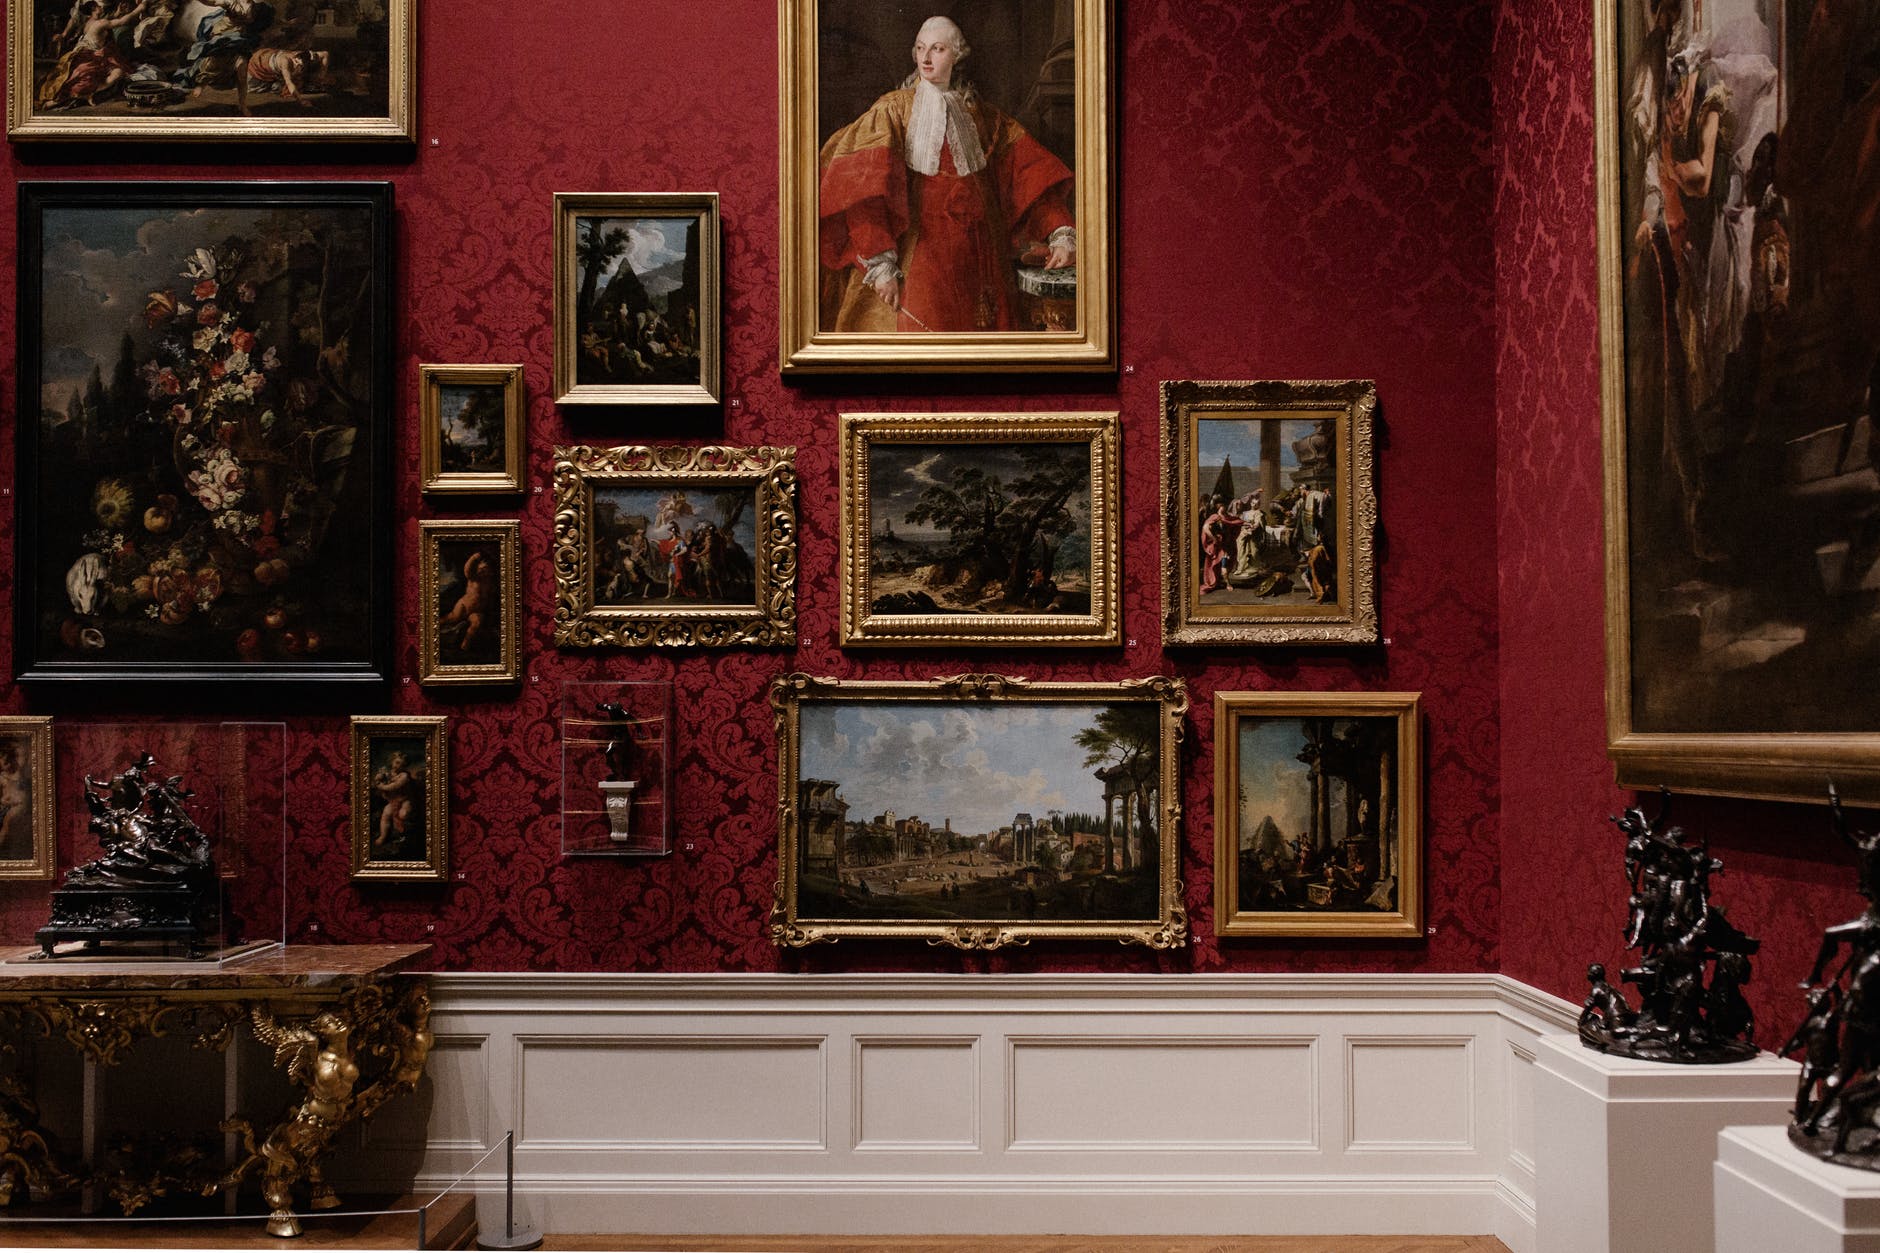
Your first step in learning to paint like the old masters is to pick a particular style you want to emulate, since so much of this will involve looking at artwork that has already been painting and either recreating it to the best of your ability, or at least attempting to understand the types of brushstrokes and layering being used.
You should pick your own favourite artists, certainly, since you’ll enjoy yourself when practicing more that way. If you can’t think of any at the moment, some artists to start off with are Angelica Kauffman, Hans Holbein the Younger, Raphael, Leonardo da Vinci, or John Singer Sargeant.
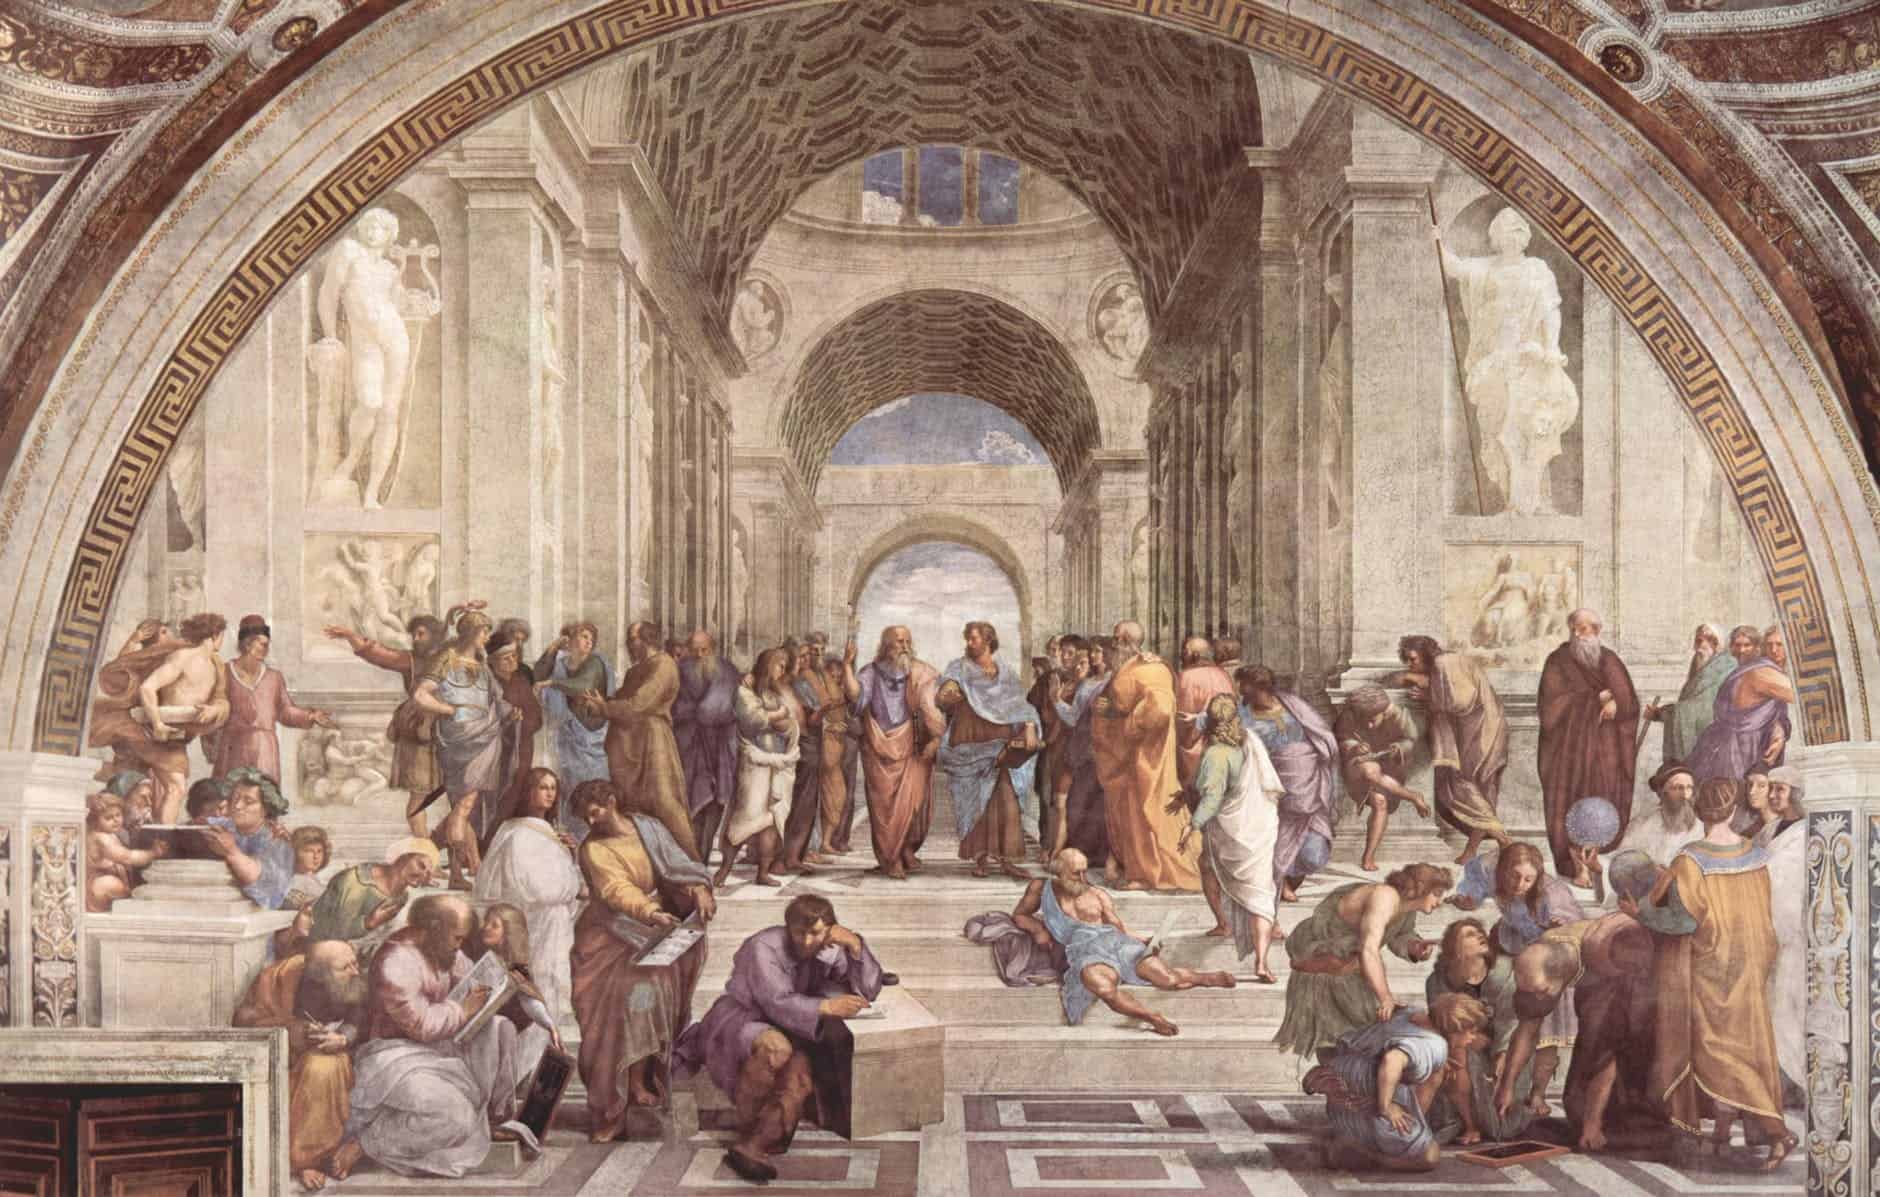
All of these artists have their own unique styles, from the way that they held the brush, to the kinds of undertones that they layered in order to create the living colours of life, and some of them did not even primarily use paint!
But once you have an inspiration in mind, and are ready to learn from them, you can move onto the next step.
One of the most important stages of oil painting is to prepare your canvas before applying any paint on it. Some acrylic painters whitewash their canvases, but for oil painting, your best approach is to apply a layer of white, oil-based gesso, brushing liberally over the surface of the raw canvas.
As is always the case with oil painting, make sure that you do this step in a well-ventilated area with proper protective gear, and to give the layer plenty of time to cure before you move forward. You may want to do this with several canvases at once, because oil-based gesso can take upwards of a week to cure properly.
Now that your canvas is properly cured, you can begin to paint.
While most of the old masters we’re attempting to emulate painted portraits based on living subjects who sat and modeled for them, this process can actually take many hours of work, so it may be better to begin with still lifes that you can recreate with the same positioning and lighting between painting sessions.
For example, you can pose a stack of books, or a few wax candles on a table, and even a shiny metallic item if you’d like to challenge yourself.
While these still lifes are a long way away from painting oil portraits of royalty, this is the same practice that artists from all ages and all walks of life used to hone their skill and practice their painting before undertaking more challenging projects.
As with all oil paintings, begin these still lifes by first sketching a simple sketch that you can apply your toning layer onto without easily covering up, and leave yourself plenty of room for adding detail as you go. Oil painting depends heavily on layering as a method of adding depth and colour, so the sketch should only represent the basic layout of the painting, leaving the details to be added as you go.
Once you have your sketch, you can then apply a very thin layer of paint known as the imprimatura – literally meaning the first layer of the painting. This part demands a little bit of research, depending on which artist you are attempting to emulate, since each artist had their own preferred shade of imprimatura to tone their painting with – however, it is almost always a basic shade of olive, beige, brown or light brown, as this layer acts as the ground on which you build your painting up from.
Once the painting is complete, the light should be able to penetrate through the layers of paint all the way down to the imprimatura, showing the depth of the painting you’ve created.
Your next step should be to begin layering paint on the canvas, as is the nature of oil painting. You’ll want to begin by “establishing values” – that is to say, recognising which aspects of the painting will have the darkest parts, and which the lightest, and then block in large areas of paint to reflect that.
You can block out the flesh tones and background early on, since these will have the most layering as you go.
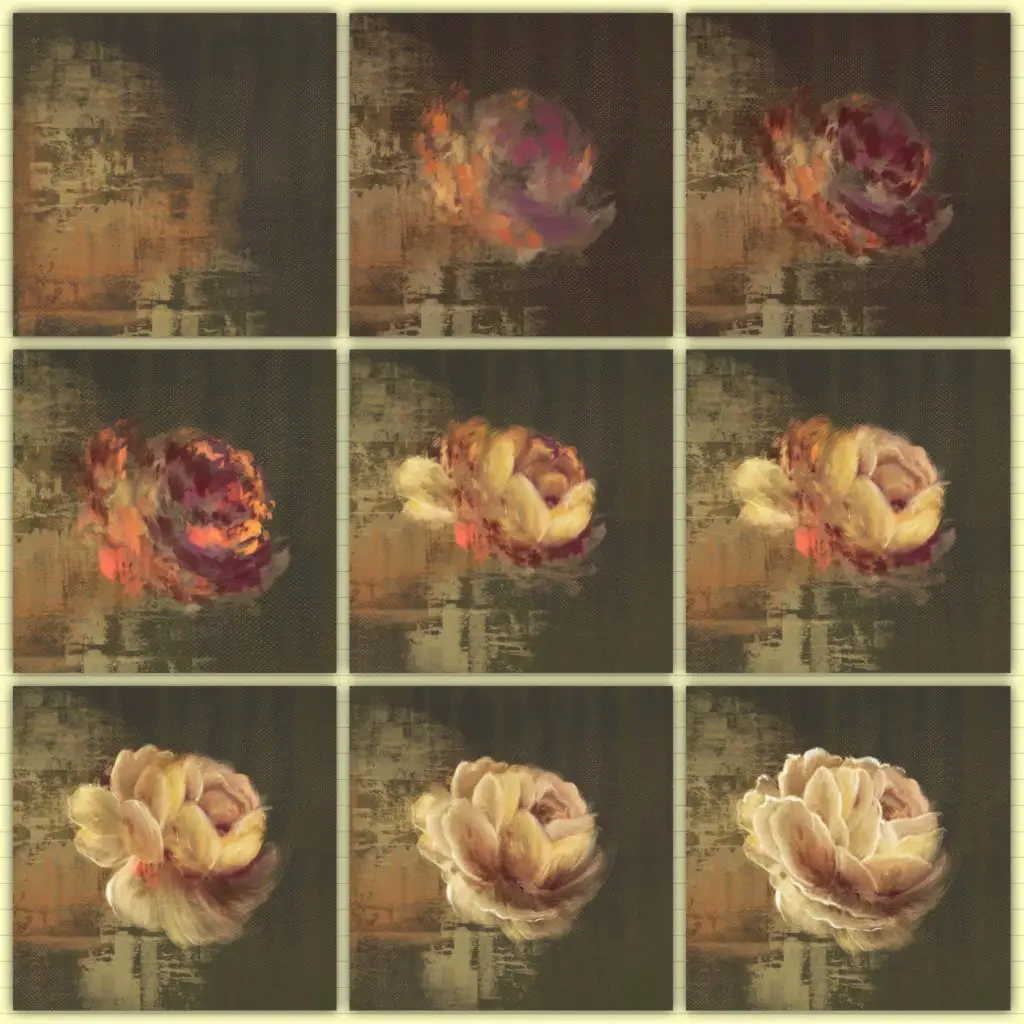
Begin by adding simple, flat tones to aspects of the painting, and then, in each subsequent layer, adding more and more depth to painting, such as adding warm tones and shading.
Oil painting is essentially recreating a painting in reverse, where the last layer you add is the first that the eye catches, so make sure to leave reflective, watery, or translucent surfaces to the final layers.
One trick you can employ is to have a small amount of neutral oil on hand, and, as you finish layers, apply a small amount to the canvas. This should be a good indicator of how the paints you’ve laid out will appear to the viewer once the painting is complete and varnished.
Once you’re completely satisfied with your painting, make sure to give it plenty of time to dry in a safe location where no-one is exposed to fumes.
Regardless of how you feel about your first attempts, you should be very proud of yourself for getting to this step! Oil painting is a process that takes many, many hours and a great deal of dedication and patience, and the fact that you’ve gone through with it is amazing just as it is.